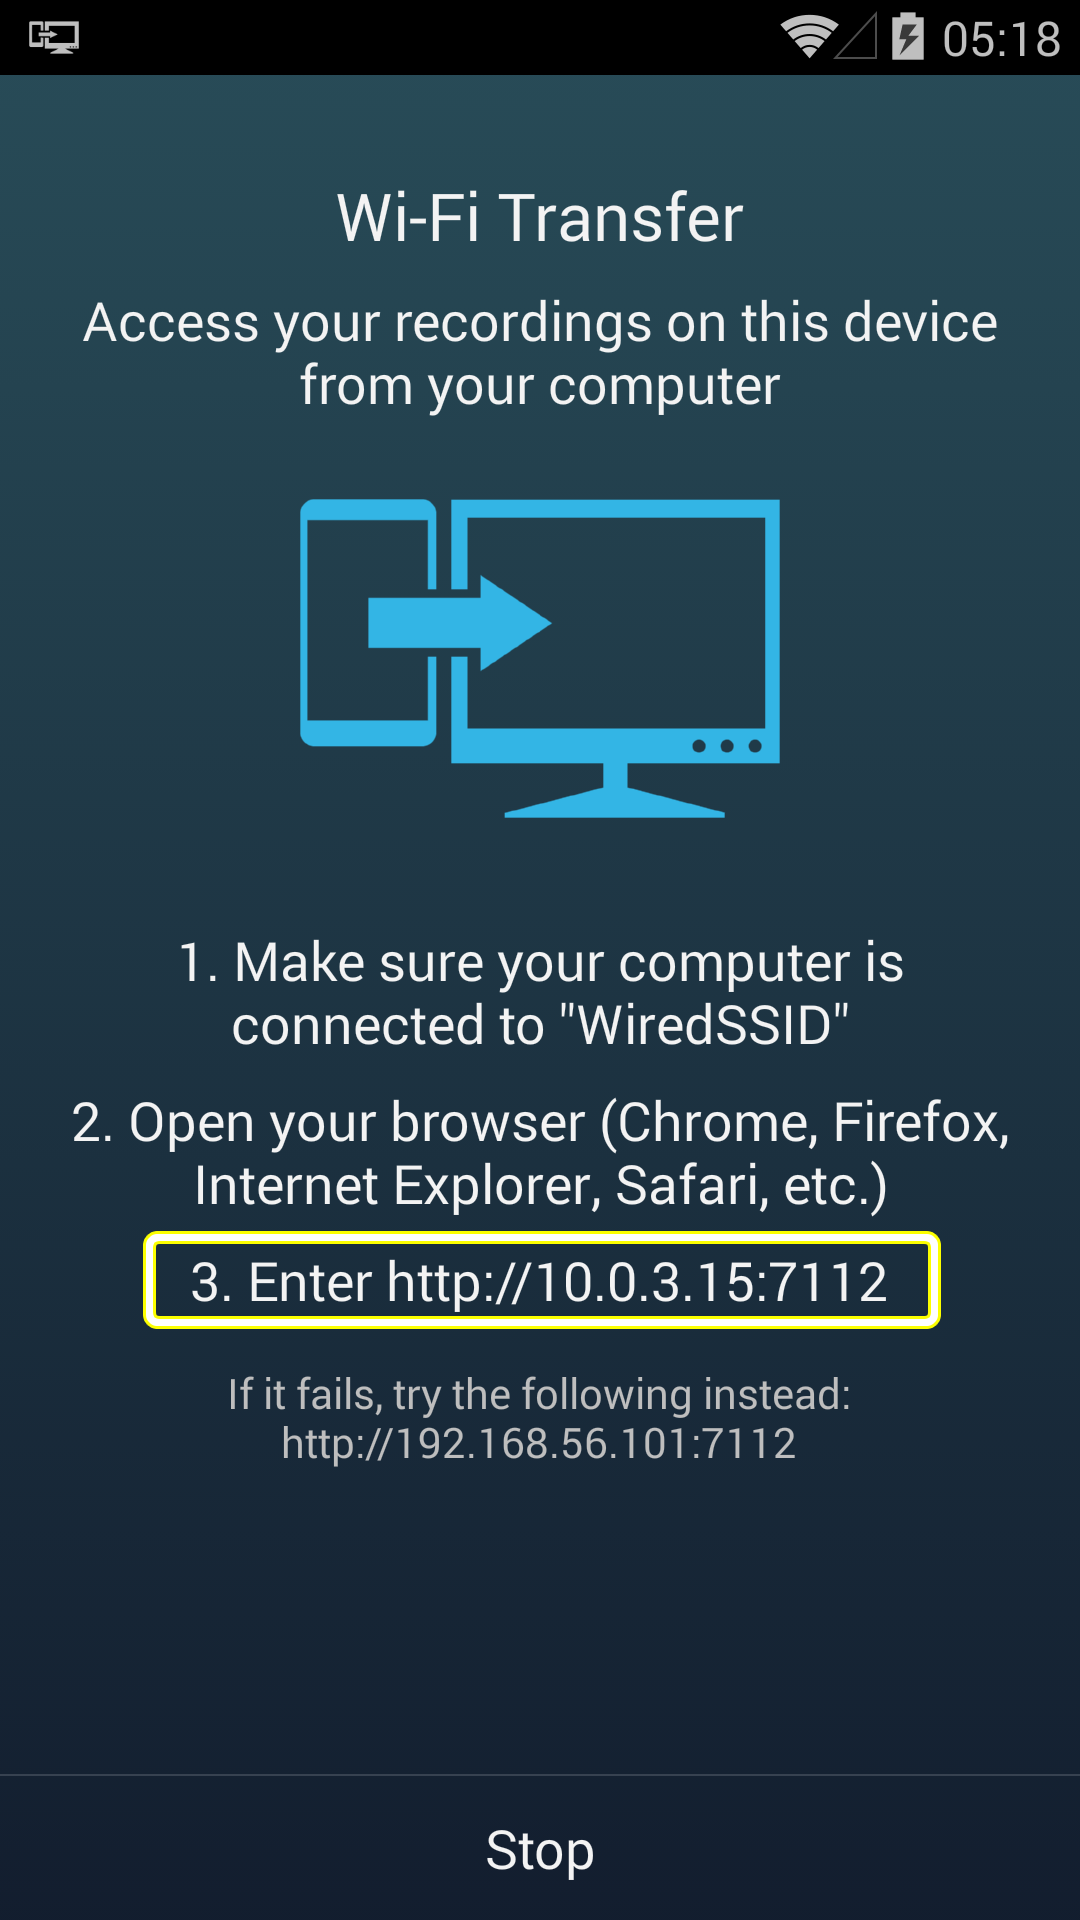
Wi-Fi Transfer allows you to access your recordings on your device from your computer.
There are two methods to perform Wi-Fi Transfer.
Firstly, make sure your device and your computer are connected to the same Wi-Fi connection.
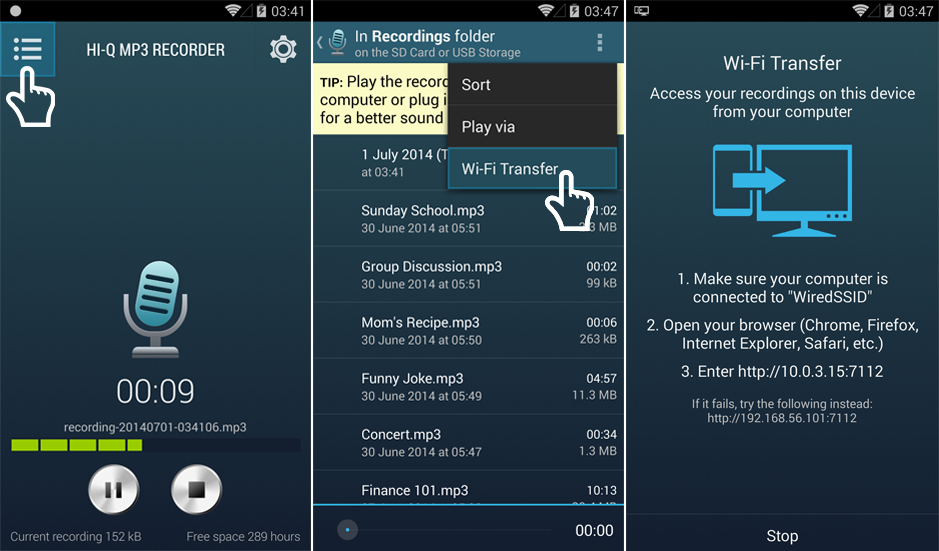
- Open the Recording List
- Select the overflow menu, or press MENU on your device
- Select Wi-Fi Transfer
- Open your Browser (e.g Chrome, Firefox, Internet Explorer, Safari, etc.) on your computer
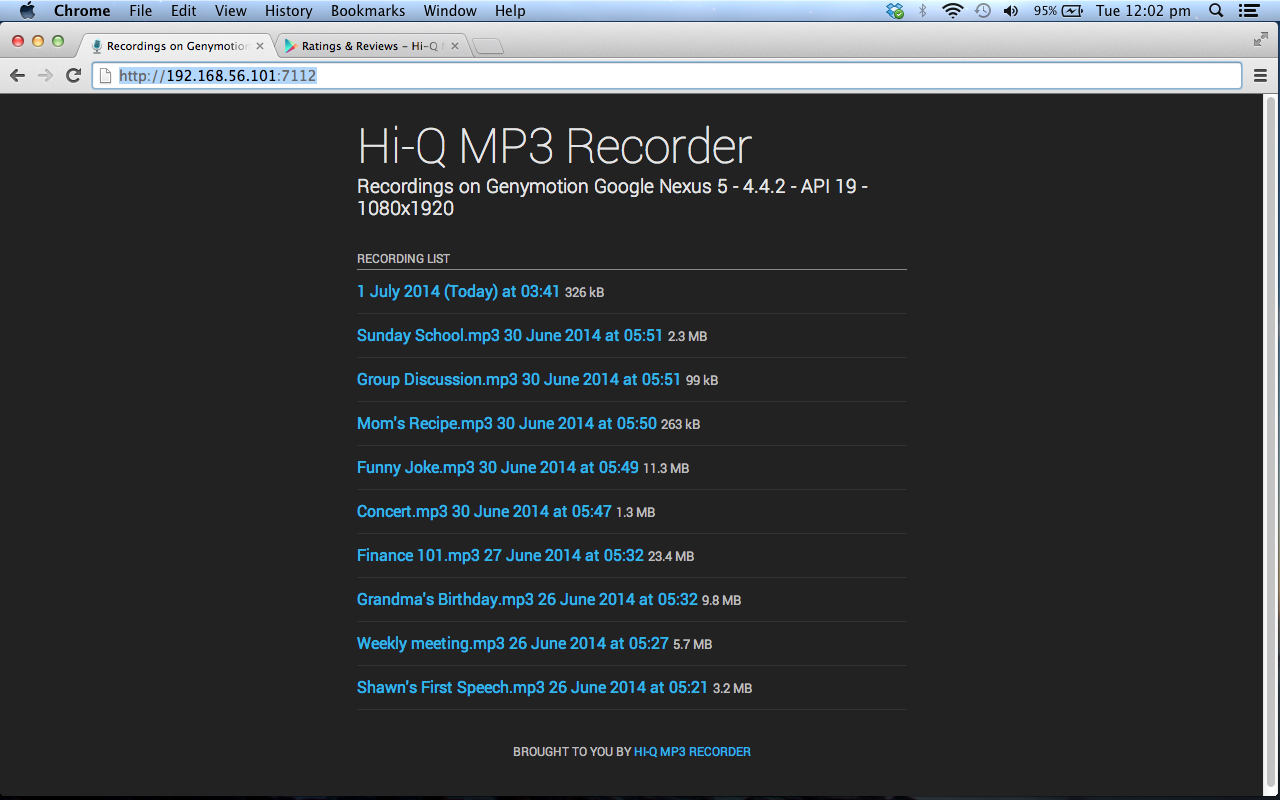
- Enter the http:// address displayed on your device to your browser
- Start downloading the recordings
 The second method to perform Wi-Fi Transfer is by connecting your PC to access point (tethering) of your device. Tethering allows connecting your device with your computer.
- Select the System Settings (Settings app) on your phone
- Select More…
- Select Tethering & portable hotspot and activate it
- Connect your computer to your device as an Internet access point
- Open your Browser (e.g Chrome, Firefox, Internet Explorer, Safari, etc.) on your computer
- Enter the http:// address displayed on your phone to your browser
- Start downloading the recordings
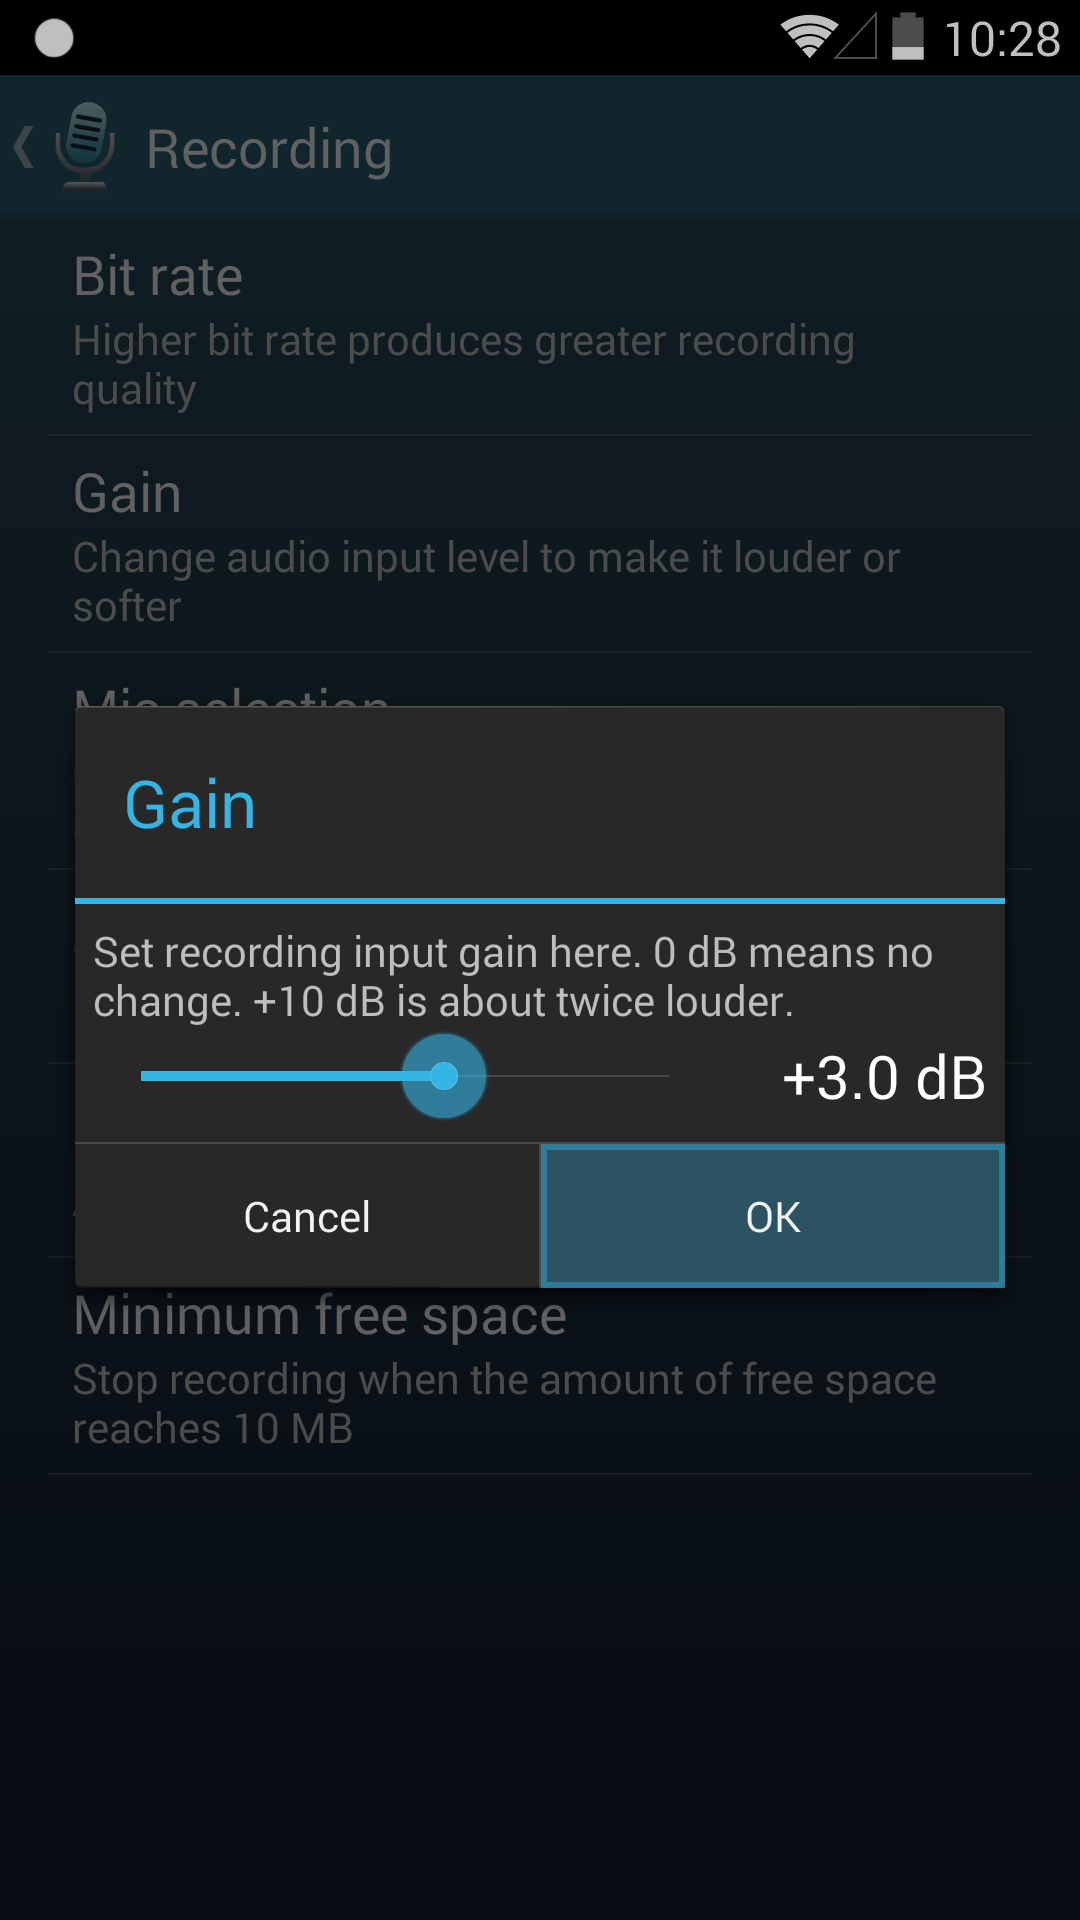
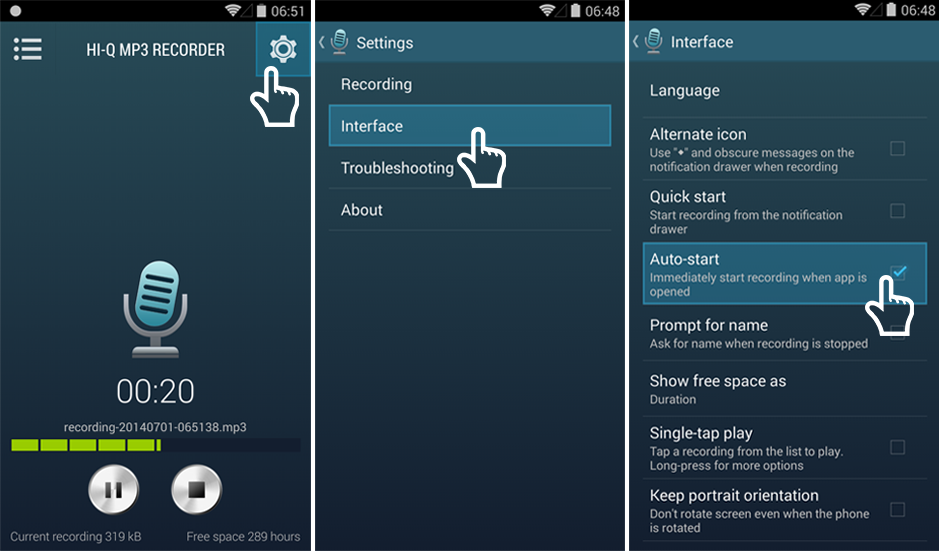
Take note that Wi-Fi Transfer will only display recordings on the location of stored recordings. You can change the locations in app Settings, then select Recording, and choose your preferred location of stored recordings.
Should you need further assistance, please do not hesitate to contact us!